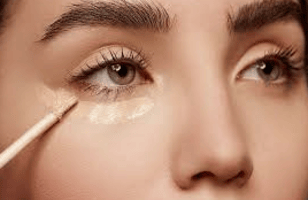
Concealer is often called the secret weapon in any makeup arsenal but knowing exactly where to apply concealer can transform your makeup routine from basic to brilliant. Whether you’re dealing with dark circles, blemishes, or simply want to highlight certain features, understanding the right places to apply concealer can make all the difference in achieving that flawless finish we all desire.
Many makeup enthusiasts focus on foundation as their primary coverage product, but concealer is actually where the magic happens when it comes to targeted correction and enhancement. From the under-eye area to unexpected places that can elevate your entire look, we’ll explore the techniques that makeup artists swear by.
By the end of this guide, you’ll understand not just where to apply concealer, but also how to use it effectively for a naturally flawless appearance that lasts all day.
Understanding Concealer: The Basics
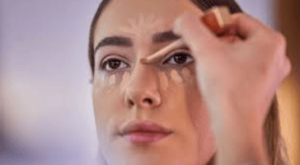
Concealer is a highly pigmented cosmetic specifically designed to cover imperfections and create an even skin tone. Unlike foundation which provides overall coverage, concealer targets specific areas needing extra attention.
Types of Concealers
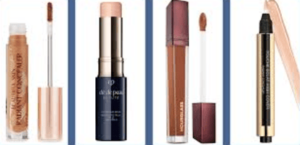
- Liquid concealers – Versatile options that work well for most skin concerns
- Cream concealers – Provide high coverage for stubborn discoloration
- Stick concealers – Travel-friendly and perfect for spot treatment
- Color-correcting concealers – Address specific color concerns (green cancels redness, peach/orange neutralizes dark circles)
When choosing where to apply concealer, your selection should be influenced by your specific needs and the type of concealer you’re using. Some formulations work better for certain areas of the face than others, which we’ll explore in more detail throughout this guide.
Selecting the Right Shade
Finding the perfect concealer shade is critical to achieving a natural look. For under-eye application, choose a shade 1-2 tones lighter than your foundation to brighten the area. For blemishes and other imperfections, match your concealer exactly to your foundation or skin tone to avoid highlighting the very spots you’re trying to conceal.
Under-Eye Area: Banishing Dark Circles
The under-eye area is perhaps the most common place where people apply concealer, and for good reason. This delicate region is prone to discoloration, puffiness, and fine lines that can make us look tired even when we’re well-rested.
The Triangle of Light Technique
Instead of simply dabbing concealer directly under the eyes, try the ‘triangle of light’ method:
- Draw an inverted triangle with the base under your eye and the point toward your cheek
- This technique not only covers dark circles but also brightens the center of your face
- It creates a lifting effect that looks more natural than circular application
Inner Corner Brightening
The innermost corner of the eye, near the tear duct, often appears darker than the rest of the under-eye area. Applying concealer here:
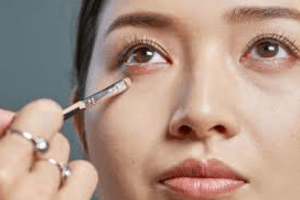
- Opens up the eyes and makes them appear larger
- Connects with the nose concealing for a seamless look
- Helps you appear more awake and refresher
Lower Lash Line
When applying concealer where the lower lashes meet the skin:
- Use a precision brush for accurate application
- Apply with a patting motion rather than dragging
- Set with a small amount of translucent powder to prevent creasing
Remember that the skin under the eyes is thin and delicate. Use a hydrating formula and apply with your ring finger or a damp makeup sponge to ensure gentle application where concealer is needed most in this sensitive area.
Blemishes and Acne: Targeted Coverage
When dealing with blemishes, precision is key. Unlike the under-eye area where a brightening effect is desired, when covering spots, the goal is to make them disappear by perfectly matching your skin tone.
Pinpoint Concealing Technique
- Use a small, pointed brush to apply concealer directly on the blemish
- Pat gently to build coverage without disturbing surrounding makeup
- Avoid over-applying, which can draw attention to the area
The Setting Step
After applying concealer to blemishes:
- Allow the product to sit for 30 seconds to build coverage
- Gently set with a small amount of matching powder
- This technique, sometimes called ‘spot baking,’ ensures longevity
Color Correction for Inflamed Blemishes
For red, inflamed blemishes:
- Apply a tiny amount of green color corrector before your regular concealer
- Layer skin-matching concealer on top
- Blend the edges carefully to seamlessly transition to the rest of your foundation
Applying concealer to blemishes requires a different approach than other areas of the face. The goal is camouflage rather than highlighting, making technique and product choice particularly important.
Redness and Discoloration: Evening the Skin Tone
Many people struggle with redness around the nose, cheeks, or chin. Concealer can be a fantastic tool for neutralizing these areas to create an even canvas.
Areas Prone to Redness
- Around the nostrils
- Center of the cheeks
- Chin and jawline
- Sides of the mouth
Layering Technique for Redness
- Start with a thin layer of color corrector if redness is significant
- Apply your foundation as usual
- Use concealer only where redness still shows through
- Blend thoroughly with a damp sponge for a natural finish
Post-Blemish Discoloration
After a blemish heals, it often leaves behind a red or purple mark. These post-inflammatory marks can benefit from concealer application.
- Apply concealer with a slightly warmer tone than your natural skin
- Use a stippling motion to build coverage gradually
- Set with a translucent powder to ensure longevity
Addressing redness with concealer is about creating balance rather than masking the entire face. Strategic placement where discoloration exists helps maintain a natural appearance while still providing the coverage you need.
Highlighting and Contouring: Strategic Enhancement
Concealer isn’t just for covering imperfections; it’s also a powerful tool for facial sculpting when placed strategically. Using a lighter shade of concealer can bring forward certain features, while a deeper shade can create dimension.

Key Highlighting Areas
- Center of the forehead
- Bridge of the nose
- Cupid’s bow above the lips
- Center of the chin
Creating Dimension with Concealer
- Apply highlighting concealer in a thin line down the center of your nose
- Dab a small amount above your cupid’s bow to define your lip shape
- Place highlighting concealer in the center of your chin to bring it forward
- Use a shade lighter than your foundation for all highlighting applications
The Cleanup Technique
Concealer can also be used to clean up and sharpen other makeup:
- Define the outer edge of your lipstick by tracing around it with concealer
- Clean up any eyeshadow fallout beneath the eyes
- Sharpen the edge of winged eyeliner
When using concealer for highlighting purposes, remember that subtlety is key. The goal is to create natural-looking dimension rather than obvious stripes of light and shadow.
Around the Nose: Combating Common Issues
The area around the nose presents multiple challenges including redness, discoloration, enlarged pores, and shadows that can create an uneven appearance.
Targeting Nose-to-Mouth Lines
Apply concealer in the creases that run from the sides of the nose to the mouth
- Use a shade that matches your skin exactly
- Blend thoroughly to avoid settling into fine lines
Redness Around Nostrils
- Apply concealer around the edges of the nostrils where redness commonly occurs
- Use a patting motion rather than wiping to maintain coverage
- Set with powder to prevent the product from sliding throughout the day
The Nose Bridge Connection
- Connect your under-eye concealer application with the bridge of your nose
- This creates a harmonious, balanced brightening effect
- It helps eliminate shadows that can make the face appear tired
The nose area requires special attention when applying concealer, as it’s a central feature of the face and one that experiences significant movement throughout the day. Proper application and setting techniques are essential for lasting coverage.
Lips and Mouth Area: Definition and Prevention
The area around your mouth can benefit greatly from strategic concealer application, both to define the lips and to prevent lipstick from feathering or bleeding.
Creating a Clean Lip Line
- Apply concealer around the natural lip line to create definition
- Use a small precision brush for careful application
- Set with translucent powder to prevent the concealer from mixing with lipstick
Correcting Lip Discoloration
- Apply a thin layer of concealer over your lips before lipstick application
- This creates a blank canvas for true color payoff
- It’s especially helpful when wearing bright or dark lipsticks
Addressing Smile Lines
- Apply a small amount of lightweight concealer to the creases that form when you smile
- Blend thoroughly with a moist makeup sponge
- Avoid heavy formulations that will settle into lines
The mouth area moves constantly as we speak, eat, and express ourselves, making it challenging for makeup to stay in place. Using concealer strategically in this region helps create definition while ensuring your lipstick looks fresh throughout the day.
Eyebrows and Eyelids: Precision and Definition
Concealer plays a crucial role in eye makeup, from creating the perfect base for eyeshadow to defining and shaping brows.
Creating an Eyeshadow Base
- Apply a small amount of concealer to the eyelids
- Blend thoroughly and set with a neutral powder
- This creates an even base that helps eyeshadow colors appear true to tone
Defining Brow Shape
- Apply concealer around the edges of your filled-in brows using a small brush
- Blend the edges carefully to create clean, defined brows
- This technique instantly lifts the eye area and creates a polished look
Brightening the Brow Bone
- Apply a small amount of highlighting concealer just beneath the arch of your brow
- Blend well to create a subtle lifting effect
- This draws attention upward and makes the eyes appear more open
Using concealer around the eye area requires a delicate touch and formulations that won’t crease. Opt for lightweight, buildable products that set well and won’t interfere with other eye makeup.
Where Professionals Apply Concealer
Makeup artists often have unexpected tricks for concealer application that can take your makeup routine to the next level. These techniques focus on areas you might not have considered.
The Center of the Forehead
- Apply a small amount of brightening concealer to the center of the forehead
- Blend outward toward the hairline
- This creates a natural highlight that brings the face forward
The Jawline Technique
- Use a concealer that matches your neck exactly along the jawline
- This creates a seamless transition between face and neck
- It’s especially helpful if your foundation shade isn’t a perfect match
Inner Eye Corners
- Apply a small dot of brightening concealer to the innermost corners of the eyes
- Blend minimally, keeping the brightness concentrated in this small area
- This instantly makes you look more awake and refreshed
These professional techniques focus on strategic placement rather than heavy application, creating subtle enhancements that elevate your entire makeup look.
Application Tools: Choosing the Right Method
Where you apply concealer is important but so is how you apply it. Different tools create different effects and work better for specific areas of the face.
Fingertip Application
- Best for: Under-eye area, larger areas needing coverage
- Benefit: The warmth of your finger helps blend the product into the skin
- Technique: Use your ring finger which naturally applies the least pressure
Concealer Brushes
- Best for: Precise application on blemishes, around the nose, lip line
- Benefit: Allows for targeted placement and buildable coverage
- Technique: Use small, stippling motions rather than wiping or dragging
Beauty Sponges
- Best for: Blending concealer seamlessly, especially in larger areas
- Benefit: Creates an airbrushed finish with no visible edges
- Technique: Dampen the sponge slightly before use and use a bouncing motion
The right tool can make a significant difference in how your concealer looks and performs, so experiment with different application methods to find what works best for you.
Making Concealer Last
Knowing where to apply concealer is just the
first step; ensuring it stays in place throughout the day is equally important. Different areas of the face benefit from different setting techniques.
Under-Eye Setting
- Use a small amount of finely-milled setting powder
- Apply with a fluffy brush or press gently with a velour puff
- Focus only on areas where concealer tends to crease
Blemish Setting
- Apply setting powder directly over concealed blemishes
- Allow it to sit for 20-30 seconds before gently dusting away excess
- This ‘spot baking’ technique ensures maximum longevity
Setting Sprays
- Mist a setting spray over your completed makeup
- This helps all products, including concealer, meld with the skin
- It creates a natural finish while extending wear time
Setting your concealer appropriately ensures that your carefully placed product stays exactly where you want it, maintaining coverage throughout the day.
FAQs
How do I keep my under-eye concealer from creasing?
To prevent under-eye concealer from creasing, start with a hydrating eye cream and allow it to fully absorb. Use a lightweight formula and apply it sparingly using a damp beauty sponge. Set immediately with a small amount of finely-milled setting powder, focusing only on areas where creasing typically occurs.
Throughout the day, gently press the area with your ring finger if you notice any settling into fine lines, which will redistribute the product without adding more.
Should concealer be lighter or darker than foundation?
This depends on the purpose of your concealer application. For brightening the under-eye area and highlighting facial features, choose a concealer 1-2 shades lighter than your foundation. For covering blemishes, hyperpigmentation, or creating contour, select a concealer that exactly matches your foundation or skin tone.
Using a shade too light on blemishes will draw attention to them rather than camouflaging them. Many makeup artists recommend having at least two concealer shades in your collection for different purposes.
How do I apply concealer for mature skin?
When applying concealer on mature skin, hydration is key. Choose a moisturizing formula with light-reflecting properties rather than a matte finish. Apply sparingly using a damp beauty sponge or your fingertips, focusing on areas of discoloration rather than fine lines or wrinkles.
Avoid heavy powder setting, opting instead for a light dusting of finely-milled setting powder or a hydrating setting spray. Remember that less is more – building up in thin layers creates a more natural finish than applying one heavy layer.
Which goes first, foundation or concealer?
Most makeup artists recommend applying foundation first, followed by concealer. This approach allows you to see which areas still need additional coverage after foundation, preventing unnecessary product buildup.
However, for significant discoloration or for color-correcting concerns, you may apply concealer first, then foundation, and finally a second layer of concealer if needed. Ultimately, the best approach depends on your specific concerns and the level of coverage you desire.
Can concealer be used without foundation?
Absolutely! Concealer can be used without foundation for a more natural, minimal makeup look. Apply concealer only to areas needing coverage such as under the eyes, around the nose, and on any blemishes or discoloration.
Blend thoroughly using a damp beauty sponge to ensure seamless edges. Lightly dust with translucent powder or setting spray to set. This technique is perfect for ‘no-makeup makeup’ looks or for those who prefer targeted coverage rather than all-over foundation.
Conclusion…
Mastering where to apply concealer is truly an art that can transform your makeup routine and enhance your natural beauty. From the traditional under-eye application to unexpected places like the center of the forehead or the edges of your lips, strategic concealer placement can address specific concerns while creating dimension and brightness.
Remember that concealer is not just for covering imperfections – it’s a versatile tool that can highlight, define, and perfect when applied correctly. Over time, you’ll develop an intuitive understanding of exactly where to apply concealer for a flawless, natural-looking finish.
By incorporating these professional techniques into your daily routine, you’ll be able to achieve a polished, refined look that enhances your features while addressing any concerns – proving that when it comes to makeup, sometimes it’s the smallest details that make the biggest difference.

