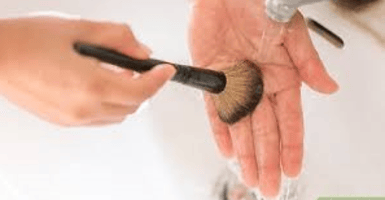
Makeup brushes are essential tools in our beauty arsenal, but how often do we stop to think about how to clean makeup brushes properly? If you’ve ever noticed your foundation looking patchy or your eyeshadow not blending as smoothly as it used to, dirty makeup brushes might be the culprit.
Regular cleaning of your makeup brushes doesn’t just improve makeup application—it’s crucial for skin health too. When we neglect to clean our makeup brushes, they become breeding grounds for bacteria, oil, and product buildup that can lead to clogged pores and breakouts.
In this comprehensive guide, I’ll walk you through everything you need to know about keeping your brushes in pristine condition, extending their lifespan, and protecting your skin in the process.

Why Cleaning Your Makeup Brushes Is Essential
Let’s understand why learning how to clean makeup brushes should be a priority in your beauty routine:
Health Benefits
- Prevents bacterial growth that can cause acne and skin infections
- Reduces risk of eye infections from contaminated eye makeup brushes
- Minimizes exposure to accumulated dust and allergens
Makeup Performance Benefits
- Ensures smoother and more precise makeup application
- Prevents muddy color mixing from residual product
- Maintains the intended finish of your makeup products
Brush Longevity Benefits
- Protects your investment by extending the life of your brushes.
- Preserves the softness and shape of the bristles
- Prevents bristle damage from hardened product buildup
Studies have shown that makeup brushes can harbor more bacteria than toilet seats if left unwashed. This sobering fact alone should motivate us to establish a regular cleaning routine.
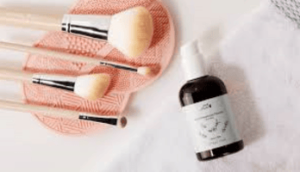
How Often Should You Clean Your Makeup Brushes?
The frequency of cleaning depends on how often you use your brushes and what you use them for:
Foundation Brushes
- Should be cleaned weekly at minimum
- Daily cleaning is ideal for those with acne-prone or sensitive skin
- Quick spot cleaning can be done after each use
Eye Brushes
- Clean every two weeks if used regularly
- Clean immediately after using with bright pigments to prevent staining
- Brushes used with cream products need more frequent cleaning
Powder Brushes
- Can typically go up to two weeks between deep cleanings
- Benefit from a gentle tap to remove excess powder after each use
- Should be cleaned more often during flu season or when you’re sick
Essential Supplies for Cleaning Makeup Brushes
Having the right tools for the job makes how to clean makeup brushes much simpler:
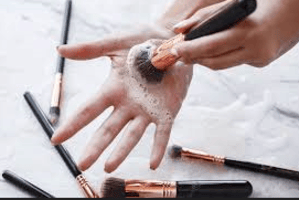 Cleaning Solutions
- Gentle clarifying shampoo or baby shampoo
- Specialized brush cleaners from beauty retailers
- Mild dish soap (excellent for cutting through oils in foundation brushes)
- Antibacterial soap for deeper sanitization
Tools and Accessories
- Textured cleaning mats or silicone cleaning gloves
- Brush cleaning palettes with different textures
- Microfiber towels for gentle drying
- Brush guards to maintain brush shape while drying
- Shallow bowl or clean sink
Optional but Helpful
- Spray bottle for quick cleaning solutions
- Rubbing alcohol for sanitizing (metal parts only, not bristles)
- Brush drying rack or holder
With your supplies gathered, let’s walk through the step-by-step process of how to clean makeup brushes thoroughly.
Step-by-Step Guide: How to Clean Makeup Brushes
Follow these simple steps for a deep clean that will leave your brushes fresh and ready for flawless makeup application:
Preparation Phase
- Gather all brushes that need cleaning
- Sort brushes by type (face brushes, eye brushes, etc.)
- Prepare your cleaning solution in a shallow bowl
- Ensure your workspace is clean and has space for drying
The Washing Process
- Wet the brush bristles with lukewarm water, keeping the ferrule (metal part) and handle dry
- Swirl the brush in your chosen cleanser, working it gently into the bristles
- For stubborn product buildup, massage the cleanser into the bristles with your fingers
- Rinse thoroughly until water runs clear
- If the brushes are extremely dirty, repeat as needed.
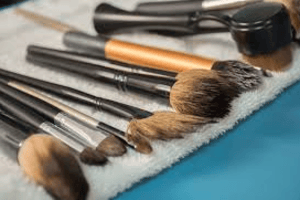 Drying and Reshaping
- Squeeze extra water out of the bristles gently.
- Return the brush head to its initial shape.
- Lay brushes flat on a towel with heads hanging off the edge
- Allow at least 6-8 hours for complete drying
- Use brush guards for precision brushes to maintain their shape
Remember that proper drying is just as important as proper cleaning. Allowing water to seep into the ferrule can loosen the glue, causing bristle shedding and a shortened brush lifespan.
Quick Cleaning Methods Between Deep Cleans
Sometimes you need to switch colors or cleanse a brush quickly between deep cleaning sessions:
Spot Cleaning Options
- Use a spray brush cleaner for quick refresh between colors
- Wipe bristles gently on a microfiber cloth after spraying
- Allow briefly to dry before using again
DIY Quick Cleaning Solution
- Mix one part rubbing alcohol with three parts water, put both in a spray bottle.
- Apply a few drops of gentle soap or brush cleaner
- Spray on a tissue, then twirl the brush on the tissue until it is clean.
- Only use occasionally as alcohol can dry out natural bristles
Dry Cleaning Method
- Use a brush cleaning sponge for powder products
- Swirl brush on the sponge to remove excess product
- Ideal for quick color switches during eyeshadow application
These quick methods are convenient but shouldn’t replace regular deep cleaning.
Errors to Avoid When Washing Makeup Brushes
Even with the best intentions, these errors can damage your brushes or leave them less than clean:
Damaging Practices
- Submerging the entire brush in water, which loosens the glue in the ferrule
- Using hot water, which can damage both natural and synthetic bristles
- Drying brushes upright, causing water to drain into the ferrule
- Using harsh cleansers like household cleaners or strong detergents
Ineffective Cleaning Habits
- Not rinsing thoroughly enough, leaving soap residue
- Rushing the cleaning process, missing built-up product
- Not cleaning regularly enough, allowing product to harden
- Using too much force when cleaning delicate eye brushes
Post-Cleaning Errors
- Using a hairdryer to speed up drying, which can damage bristles
- Not allowing brushes to fully dry before using again
- Storing damp brushes in closed containers, promoting mold growth
- Reshaping brushes incorrectly, causing permanent deformation
Avoiding these mistakes will help extend the life of your brushes significantly.
Special Care for Different Types of Makeup Brushes
Different brush materials and functions require slightly different cleaning approaches:
Natural Hair Brushes
- Require more gentle handling than synthetic brushes
- Benefit from conditioning treatments with a bit of hair conditioner
- Should be cleaned less frequently than synthetic brushes
- Work best with gentle, sulfate-free cleansers
Synthetic Brushes
- Can handle more frequent washing
- May need stronger cleansers for stubborn makeup residue
- Dry faster than natural bristle brushes
- Are typically more resilient but still need proper care
Specialty Brushes
- Beautyblenders and other sponges need daily cleaning and thorough drying
- Fan brushes should be handled with extra care to maintain their shape
- Stippling brushes need gentle cleaning to preserve the dual-fiber arrangement
- Artis-style brushes with dense bristles need extra rinsing time
Understanding these differences helps you customize your approach to how to clean makeup brushes based on your specific collection.
DIY Brush Cleaning Solutions
If you prefer to make your own cleaning solutions, here are some effective recipes:
Simple Olive Oil and Dish Soap Cleaner
- Mix two parts dish soap with one part olive oil
- The oil helps condition bristles while the soap cleanses
- Works exceptionally well for foundation and concealer brushes
Vinegar Sanitizing Solution
- Use two parts water and one part white vinegar to make a solution
- Use as a quick disinfecting rinse after regular cleaning
- Rinse thoroughly afterward to remove vinegar smell
Tea Tree Oil Antibacterial Cleanser
- Add 5-10 drops of tea tree oil to your regular brush shampoo
- Provides antibacterial benefits for acne-prone skin
- Creates a refreshing scent while cleaning
Gentle Castile Soap Mixture
- Dilute liquid castile soap with water
- Add a few drops of jojoba or almond oil for conditioning
- Perfect for natural hair brushes that need extra care
These DIY solutions can be just as effective as store-bought options and often come at a fraction of the cost.
Indications That Your Makeup Brushes Need to Be Replaced
Even with perfect cleaning techniques, brushes don’t last forever. Here are signs it might be time to invest in new tools:
Physical Damage Indicators
- Bristles constantly falling out despite proper care
- Ferrule becoming loose or detached from the handle
- Bristles remaining splayed even after proper cleaning and reshaping
- Persistent odor that doesn’t dissipate after cleaning
Performance Issues
- Brushes feeling scratchy or rough on the skin
- Inability to pick up or distribute product evenly
- Bristles breaking frequently
- Excessive shedding during application
Hygiene Concerns
- Discoloration that doesn’t improve with cleaning
- Mildew smell indicating possible mold growth
- Persistent skin breakouts when using specific brushes
- Unusual texture changes in the bristles
Knowing when to let go is part of maintaining a healthy and effective makeup tool collection.
Eco-Friendly Approaches to Brush Cleaning
For those mindful of environmental impact, these sustainable tips help you clean your brushes responsibly:
Sustainable Cleaning Products
- Choose biodegradable, plant-based cleansers
- Opt for package-free solid brush soaps
- Instead of using wipes that can be thrown away wipes, use microfiber cloths.
- Select cleaning tools made from sustainable materials
Water Conservation
- Turn off water between rinses
- Collect brush rinsing water for plants (if using natural soaps)
- Consider waterless cleansing options for quick cleans
Sustainable Disposal
- Repurpose old brushes for craft projects or cleaning tools
- Look for brush recycling programs for when replacement is necessary
- Choose brushes with sustainable materials when purchasing replacements
Environmental consciousness can extend to every aspect of your beauty routine, including how to clean makeup brushes.
FAQs
How can I tell if my makeup brushes need cleaning?
Your makeup brushes need cleaning if you notice any of these signs: colors looking muddy when applied, bristles feeling stiff or crusty, makeup not blending smoothly, visible product buildup on the bristles, or if you’re experiencing unusual breakouts.
Another easy test is to wipe the brush on a tissue—if it leaves significant residue, it’s time for a clean. For those with sensitive or acne-prone skin, regular cleaning is even more critical, as bacteria can accumulate quickly and trigger skin issues
Can I clean my makeup brushes with ordinary shampoo?
Yes, you can use regular shampoo to clean makeup brushes, but it’s best to choose a gentle, clarifying formula without heavy conditioners or additives. Baby shampoo is often recommended because it’s designed to be mild and rinses clean.
Avoid shampoos with silicones or heavy moisturizers as they can leave a residue on the bristles that affects makeup application. For brushes used with oil-based products like foundation or concealer, adding a bit of dish soap can help break down the oils more effectively.
How long does it take for makeup brushes to dry completely?
Makeup brushes typically take 6-24 hours to dry completely, depending on several factors: the size and density of the brush, the material of the bristles (synthetic usually dries faster than natural hair), and the environmental conditions like humidity and temperature. Laying brushes flat on a towel with the bristles hanging over the edge in a well-ventilated area promotes faster drying.
Never use a hairdryer to speed up the process as the heat can damage the bristles and loosen the glue in the ferrule. Always ensure brushes are completely dry before using them again.
Is it better to clean makeup brushes with cold or warm water?
Lukewarm water is best for cleaning makeup brushes—not too hot and not too cold. Hot water can damage the bristles and dissolve the glue that holds them in place, while cold water may not effectively remove oils and product buildup. The ideal temperature is similar to what you’d use to wash your face.
Always keep the water flowing downward from the base of the bristles toward the tips, avoiding the ferrule (the metal part) as much as possible to prevent water from seeping in and causing damage to the handle or loosening the bristles.
Can dirty makeup brushes cause acne or skin infections?
Yes, dirty makeup brushes can definitely cause acne and skin infections. When left unwashed, brushes accumulate dead skin cells, oil, makeup residue, and environmental dust—creating a perfect breeding ground for bacteria. When these bacteria-laden brushes touch your skin, they can transfer the microbes into your pores, potentially causing acne, folliculitis, or even staph infections.
Regular cleaning of makeup brushes is considered by dermatologists to be an essential step in preventing these skin issues.
Conclusion…
Learning how to clean makeup brushes properly is an investment in both your skin health and your makeup application. Clean brushes are the unsung heroes of a flawless makeup application, and now you have all the knowledge you need to keep them in perfect condition.
Make brush cleaning a non-negotiable part of your beauty routine, and enjoy the benefits of healthier skin and better makeup results.

