Have you ever purchased a skincare product that promised amazing results, only to find it made your skin worse? Understanding your skin type is the foundation of effective skincare, yet many of us struggle to correctly identify what our skin truly needs.
Identifying your skin type at home is actually simpler than you might think, and it can save you countless dollars on ineffective products. By the end of this guide, you’ll have the knowledge to accurately determine your skin type and finally build a routine that works with your skin rather than against it.

Why Knowing Your Skin Type Matters
Custom-tailored skincare
Your skin’s specific needs determine which products will benefit you and which might cause irritation.
Cost-effective routines
When you know your skin type, you avoid wasting money on inappropriate products.
Long-term skin health
Using the right products for your skin type prevents damage and premature aging.
Better treatment of skin concerns
Whether dealing with acne, sensitivity, or dryness, knowing your type helps target these issues effectively.
The Five Main Skin Types
Skin typically falls into one of these categories, though many people have combination characteristics:
Normal skin
Not too dry or too oily, well balanced. Pores are fine, texture is smooth, and there’s minimal sensitivity.
Dry skin
Produces less sebum than normal skin. May feel tight, rough, or flaky with visible fine lines and less elasticity.
Oily skin
Excess sebum production leads to shine, particularly in the T-zone. Pores appear larger and skin is prone to blackheads and acne.
Combination skin
Features both oily and dry areas—typically an oily T-zone with drier cheeks.
Sensitive skin
Reacts easily to products or environmental factors with redness, itching, burning, or rash.
Simple Methods to Identify Your Skin Type at Home
Let’s explore several reliable ways to determine your skin type without expensive equipment or professional consultations.
The Bare-Face Method
This classic technique requires just a few hours of your time:

Step 1: Preparation
Cleanse your face with a gentle, pH-balanced cleanser to remove all makeup, dirt, and oil.
Step 2: Wait period
After patting your skin dry, leave it completely bare (no serums, moisturizers, or makeup) for about 2-3 hours.
Step 3: Observation
After waiting, examine your skin carefully in good lighting, preferably natural daylight:
For normal skin- Your skin feels comfortable, neither tight nor oily.
For dry skin- Your skin feels tight, possibly with flaky patches or visible fine lines.
For oily skin- Your face appears shiny, especially in the T-zone (forehead, nose, and chin).
For combination skin- Your T-zone appears oily while cheeks feel normal or dry.
For sensitive skin- You might notice redness, itching, or burning sensations even after gentle cleansing.
The Blotting Sheet Test
This quick test uses blotting papers to measure oil production:
Step 1: Preparation
Start with a clean face that hasn’t been washed for at least 2 hours.
Step 2: Blotting
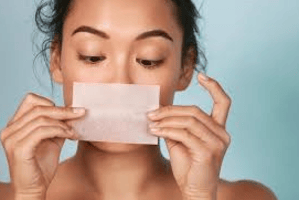
Gently press blotting papers (available at drugstores) against different areas of your face—forehead, nose, cheeks, and chin.
Step 3: Analysis
Hold the sheets up to the light to see how much oil was absorbed:
For normal skin- Minimal oil appears on the paper from any area.
For dry skin- Little to no oil is visible on the blotting sheets.
For oily skin- Significant oil appears on papers from most facial areas.
For combination skin- Papers show oil from the T-zone but little to none from the cheeks.
 The Tissue Test
A simple at-home test requiring just facial tissues:
Step 1: Preparation
Ensure your face has been clean for at least an hour without any products applied.
Step 2: Application
Press a thin facial tissue gently against different areas of your face.
Step 3: Assessment
Check the tissue for oil marks:
For normal skin- Very slight oil marks may appear.
For dry skin- No visible oil marks on the tissue.
For oily skin- Clear oil marks visible on the tissue.
For combination skin- Oil marks from T-zone areas but not from cheeks.
The Washing Test
This method focuses on how your skin feels immediately after cleansing:

Step 1: Cleanse
Wash your face with a gentle cleanser and pat dry with a soft towel.
Step 2: Wait period
Don’t apply any products and note how your skin feels after 30 minutes.
Step 3: Evaluation
For normal skin- Your skin feels comfortable and balanced—neither tight nor oily.
For dry skin- Your skin feels tight, possibly with flaking or roughness.
For oily skin- Your skin quickly becomes shiny again, especially in the T-zone.
For combination skin- Your T-zone becomes oily while cheeks remain comfortable or tight.
For sensitive skin- Your skin may feel irritated, stinging, or show redness after washing.

Magnifying Mirror Examination
A close look at your skin can reveal important clues:
Step 1: Setup
Use a magnifying mirror in good, preferably natural lighting.
Step 2: Inspection
Examine different areas of your face carefully, looking at:
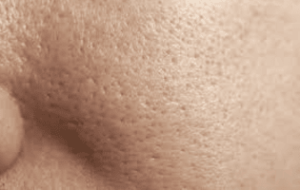
Pore size- Large, visible pores indicate oilier skin; tiny, nearly invisible pores suggest dry skin.
Surface texture- Smooth texture suggests normal skin; roughness or flaking points to dry skin.
Shine level- Reflective areas indicate oiliness; matte areas suggest normal or dry skin.
Redness patterns- Diffuse redness might indicate sensitivity or rosacea.
Seasonal Changes and Skin Type
It’s important to understand that your skin type isn’t necessarily fixed for life:
Environmental impacts- Humidity, temperature, and air quality all affect your skin’s behavior.
Seasonal shifts- Many people find their skin becomes drier in winter and oilier in summer.
Age-related changes- Skin typically becomes drier as we age due to decreased sebum production.
Hormonal influences- Pregnancy, menstrual cycles, and hormonal conditions can temporarily alter your skin type.
Consider reassessing your skin type with the changing seasons and adjusting your skincare routine accordingly.
Signs You’ve Misidentified Your Skin Type
Using products for the wrong skin type can cause various issues:
Unexpected breakouts- Using too-rich products on oily skin can cause congestion and acne.
Persistent dryness- If your skin remains dry despite using moisturizers, you may be using products too light for dry skin.
Increased sensitivity- Inappropriate products can compromise your skin barrier, leading to heightened sensitivity.
Excessive oiliness- Stripping products can trigger overproduction of oil as your skin tries to compensate.

When to Consult a Dermatologist
While at-home assessment is valuable, consider professional help if:
Persistent skin issues- Acne, rashes, or extreme dryness that doesn’t respond to appropriate skincare.
Sudden changes- Unexpected shifts in your skin’s behavior without clear environmental causes.
Confusing results- If your at-home tests yield contradictory results making it difficult to determine your type.
Suspected skin conditions- Signs of rosacea, eczema, psoriasis, or other skin disorders beyond simple type variations.
FAQs
How often should I reassess my skin type?
Check your skin type seasonally, particularly when transitioning between winter and summer. Also reassess after major hormonal changes like pregnancy, starting or stopping birth control, or around menopause.
Any time you notice your usual products suddenly seem ineffective, it’s worth retesting your skin type.
Can my skin type change permanently?
Yes, your skin type can change permanently due to age, hormonal shifts, climate changes, or medical conditions. As we age, oil production naturally decreases, often shifting oily or combination skin toward normal or dry types.
Major life changes like moving to a dramatically different climate can also cause lasting changes to your skin’s behavior.
What if my skin doesn’t clearly fit into any of the five main types?
Many people have skin that exhibits characteristics of multiple types or changes frequently. In these cases, focus on how different areas of your face behave and treat them accordingly with targeted products.
The skin type categories are guidelines rather than rigid classifications, and customizing your approach often yields better results than strictly following routines for a single type.
How do medications affect skin type assessment?
Certain medications, particularly those for acne (like isotretinoin), hormonal medications, blood pressure drugs, and some antihistamines can significantly alter your skin’s oil production and sensitivity levels.
If you’re on medication, understand that your skin type assessment might reflect a temporary state, and you should reassess after completing treatment.
Can diet affect my skin type results?
Absolutely. Diet can temporarily influence oil production, hydration levels, and skin sensitivity. High-sugar diets may increase oil production, while dehydration can make skin appear drier.
For the most accurate assessment, maintain your typical diet before testing, and consider testing on multiple days for consistency.
Conclusion…
Understanding the methods to identify your skin type at home empowers you to make informed skincare choices that will improve your skin’s health and appearance. Remember that while these tests are reliable indicators, your skin is unique and may not perfectly match a textbook description.
The ideal approach is to combine these methods, observe patterns over time, and adjust your routine based on how your skin responds. By becoming familiar with your skin’s natural tendencies through these simple at-home assessment techniques, you’ll develop an intuitive understanding of what your skin needs and when those needs change.
This knowledge is the foundation upon which truly effective skincare is built, allowing you to achieve healthier, more balanced skin without wasting time and money on inappropriate products.


