Have you ever walked out of a professional pedicure salon feeling like you’re floating on cloud nine, admiring your perfectly polished toes? That blissful feeling doesn’t have to be reserved for special occasions or expensive spa visits. Learning how to do a DIY pedicure at home can transform your self-care routine while saving you time and money.
Picture this: it’s Sunday evening, you’ve had a long week, and your feet are crying out for some tender loving care. Instead of booking an appointment and rushing to a salon, you can create your own peaceful oasis right in your bathroom.
From preparing your workspace to applying that final coat of polish, you’ll discover how a DIY pedicure at home can become your favorite form of self-care.
Why Choose a DIY Pedicure at Home?
A DIY pedicure at home offers numerous advantages that make it an attractive alternative to salon visits.
Cost-Effectiveness
Investing in quality tools and products for your DIY pedicure at home pays for itself after just a few sessions. When you multiply this by regular visits throughout the year, the costs add up quickly.
Convenience and Flexibility
One of the biggest benefits of doing a DIY pedicure at home is the freedom to pamper yourself whenever you want. No more rushing to make appointments or working around salon schedules. You can enjoy your pedicure while watching your favorite movie, listening to music, or simply relaxing in complete silence.
Hygiene Control
When you perform a DIY pedicure at home, you have complete control over cleanliness and sanitation. You know exactly how your tools are cleaned and stored, eliminating any concerns about infections or hygiene issues that can occasionally occur in busy salons.
Customization
Your DIY pedicure at home can be tailored exactly to your preferences. You can choose your favorite scents, spend extra time on areas that need attention, and create the perfect ambiance that helps you unwind completely.
Essential Tools and Supplies for Your DIY Pedicure
Success in any DIY pedicure at home starts with having the right tools and supplies. While you don’t need to invest in expensive professional equipment, having quality basics will make a significant difference in your results.
 Basic Tools You’ll Need:
- Nail clippers designed specifically for toenails
- Nail file with both coarse and fine sides
- Cuticle pusher or orange wood stick
- Pumice stone or foot file for callus removal
- Toe separators for polish application
- Small towels for drying and cleanup
Soaking and Treatment Supplies:
- Large basin or foot soaking tub
- Epsom salts or foot soaking crystals
- Gentle foot scrub or sugar scrub
- Rich foot cream or moisturizer
- Cuticle oil or treatment
Polish and Finishing Products:
- Base coat to protect nails
- Your favorite nail polish colors
- Top coat for shine and protection
- Nail polish remover for cleanup
- Cotton pads and cotton swabs
Preparing Your Space for the Perfect DIY Pedicure
Creating the right environment is crucial for an enjoyable DIY pedicure at home experience. Your preparation sets the tone for relaxation and ensures you have everything within easy reach. Start by choosing a comfortable location with good lighting.
Many people prefer their bathroom for easy cleanup, while others set up in their bedroom or living room with towels for protection. Ensure you have a comfortable chair and a stable surface for your supplies.
 Setting the Mood:
- Dim harsh lighting and use soft lamps or candles
- Play relaxing music or nature sounds
- Ensure the room temperature is comfortable
- Keep a glass of water or herbal tea close at hand.
- Turn your phone to silent to prevent distractions.
Workspace Organization:
- Before you begin, lay out all of your equipment and materials.
- Have multiple towels available for different steps
- Pour some warm water (enough to cover your feet) into your bathing bowl.
- Test water temperature to ensure comfort
- Place a towel or mat under your feet for protection
Step-by-Step DIY Pedicure Process
Following these steps methodically will ensure professional-looking results every time.
Removing Old Polish
- Begin your DIY pedicure at home by removing any existing nail polish.
- Use acetone-free nail polish remover, when possible, as it’s gentler on your nails and surrounding skin.
- Soak a cotton pad with remover and hold it against each nail for a few seconds before wiping away the polish. This technique prevents staining and reduces the need for aggressive rubbing.

Soaking Your Feet
- Fill your basin with warm water – not hot, as this can dry out your skin.
- Add Epsom salts, essential oils, or specialized foot soaking products to enhance the experience.
- To make the rest of your do-it-yourself pedicure at home much easier, soak your feet for 10 to 15 minutes to soften the skin and nails.
- During this relaxing phase, your cuticles will soften, and any callused skin will become more pliable.
- Use this time to truly relax and let the stress of your day melt away.
The soaking process is what transforms a simple nail maintenance routine into a therapeutic DIY pedicure at home experience.
Trimming and Shaping Nails
- After soaking, dry your feet thoroughly with a clean towel.
- Using proper toenail clippers, trim your nails straight across, leaving them slightly longer than the tip of your toe.
- Ingrown toenails can result from rounding the corners of your nails or cutting them too short.
- After trimming, smooth any rough areas and form the edges using a nail file.
- File in a single direction rather than back and forth to prevent splitting.
- The goal is to create a neat, even edge that follows the natural shape of your toe.
Cuticle Care
- Gently push back your cuticles using a cuticle pusher or orange wood stick.
- Cutting your cuticles can result in infection, so avoid doing so.
- If you have any hangnails or excess dead skin, carefully trim only the dead tissue with clean cuticle nippers.
- Apply cuticle oil or a rich hand cream to nourish the delicate skin around your nails.
- This step often gets overlooked in DIY pedicure at home routines, but it makes a significant difference in the overall appearance and health of your nails.
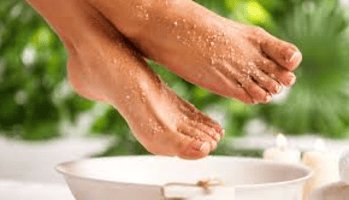
Exfoliation and Callus Removal
- This is where your DIY pedicure at home really begins to feel luxurious.
- Using a foot scrub or sugar scrub, gently massage your feet and lower legs, paying extra attention to rough areas like heels and the balls of your feet.
- For stubborn calluses, use a pumice stone or foot file while your feet are still slightly damp.
- Work gradually and gently – you want to remove dead skin, not create raw spots.
Remember that callus removal is a gradual process, so don’t expect perfection in one session.
Deep Moisturizing
- After exfoliation, rinse your feet and dry them completely.
- Apply a generous amount of foot cream or moisturizer, massaging it into your skin with circular motions.
- Pay special attention to dry areas like heels and any spots where you removed calluses.
- Consider using a foot mask or covering your feet in warm, wet towels for a few minutes to let the moisturizer absorb thoroughly as an added delight during your do-it-yourself pedicure.
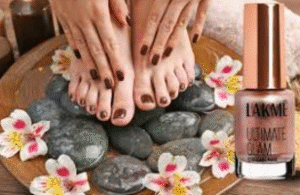
Polish Application Techniques
The final step of your DIY pedicure at home is applying polish, and this is where technique really matters for professional-looking results.

Preparation for Polish
- Before applying any color, clean your nails with rubbing alcohol or nail dehydrator to remove any oils or residue.
- Improved polish life and adherence are guaranteed by this process.
- Insert toe separators or twist tissue between your toes to keep them apart during the polishing process.
Base Coat Application
- Never skip the base coat in your DIY pedicure at home routine. A high-quality base coat helps the color polish stick better and shields your nails from discoloration.
- Apply a thin, even layer and allow it to dry completely before proceeding.
Color Application
- When applying your chosen color, use thin coats rather than trying to achieve full coverage in one application.
- Fill in the sides of the nail after starting with a stripe down the middle.
- To avoid flooding, leave a very small space between the polish and your cuticle.
- Most colors require two thin coats for optimal coverage and depth.
- Patience during this step of your DIY pedicure at home will pay off with professional-looking results.
Top Coat and Finishing
- Seal your DIY pedicure at home with a quality top coat that adds shine and extends the life of your polish.
- Apply it evenly and thinly, just like you would with the base coat, being sure to cap each nail’s free edge.
- After the top coat has dried for a few minutes, clean up any mistakes using a small brush dipped in nail polish remover.
- This final cleanup step elevates your DIY pedicure at home from amateur to professional quality.
Maintenance and Aftercare
Your DIY pedicure at home doesn’t end when the polish dries. Proper aftercare ensures your pedicure lasts longer and keeps your feet healthy between sessions.
Immediate Aftercare
- Allow polish to dry completely before putting on shoes
- Apply cuticle oil every day to keep your nails healthy, and use foot cream frequently to keep your skin supple.
- Wear open-toed shoes when possible for the first day
Long-term Maintenance
- Touch up chips immediately to extend polish life
- Reapply top coat every few days for added shine
- Perform mini-maintenance sessions between full pedicures
- To avoid fungal problems, keep your feet dry and clean.
Common Mistakes to Avoid
Even with the best intentions, certain mistakes can sabotage your DIY pedicure at home efforts. Being aware of these common pitfalls helps ensure better results every time.
Polish-Related Mistakes:
- Using thick coatings rather than several light ones
- Skipping base or top coat to save time
- Not giving each coat enough time to dry
- Using old, thick polish that doesn’t apply smoothly
Technique Mistakes:
- Trimming cuticles rather than pushing them back
- Removing too much callus at once
- Using a back-and-forth sawing motion to file nails
- Soaking feet in overheated water
Preparation Mistakes:
- Starting without all necessary supplies
- Not cleaning nails properly before polish application
- Rushing through steps to save time
- Using dirty or dull tools
Troubleshooting Common Issues
Knowing how to address common issues ensures your at-home sessions remain enjoyable and successful.
Dealing with Stubborn Calluses
If your calluses don’t respond well to regular removal during your DIY pedicure at home, consider using a callus-softening gel or cream between sessions. Apply these products according to package directions, and never attempt to remove large amounts of callused skin in one session.
Polish Problems
Streaky polish application often results from using old or thick polish. To get your polish back to its proper consistency, thin it using a few drops of nail polish thinner (never remover). If polish chips quickly, evaluate your base coat, application technique, and top coat quality.
Skin Sensitivity
Some people experience sensitivity to certain ingredients in foot care products. If you develop redness, itching, or irritation during your DIY pedicure at home, discontinue use of the product immediately and rinse the area thoroughly with cool water.
Seasonal Considerations for Your DIY Pedicure
Your DIY pedicure at home routine may need adjustments based on the season and your foot care needs throughout the year.
Summer Pedicure Focus
During warmer months when feet are more visible, focus on achieving perfect polish application and maintaining smooth, callus-free heels. Consider brighter colors and fun nail art techniques to complement summer sandals and open-toed shoes.
Winter Pedicure Priorities
Cold weather calls for extra moisturizing and attention to dry, cracked skin. Your winter DIY pedicure at home sessions might include longer soaking times, richer creams, and overnight foot treatments to combat the drying effects of indoor heating.
Advanced Techniques and Special Treatments
Once you’ve mastered the basic DIY pedicure at home routine, you might want to explore additional techniques that can enhance your experience and results.
Paraffin Treatments
Adding a paraffin wax treatment to your DIY pedicure at home routine provides intense moisture and therapeutic warmth. Paraffin treatments are particularly beneficial for dry, cracked heels and can be done safely at home with proper equipment.
Foot Masks and Peels
Incorporate specialized foot masks or chemical peels into your monthly DIY pedicure at home routine for deeper exfoliation and skin renewal. These treatments can address specific concerns like excessive dryness or stubborn calluses.
Nail Art and Design
As your confidence grows with basic DIY pedicure techniques, experiment with simple nail art designs. Start with easy techniques like accent nails, simple stripes, or dots before progressing to more complex designs.
FAQs
How often should you do a DIY pedicure at home?
Most people benefit from a complete DIY pedicure at home every 2-3 weeks. However, the frequency depends on your lifestyle, foot health, and personal preferences. Those who are very active or spend a lot of time on their feet might need weekly sessions, while others can maintain healthy feet with monthly treatments.
Between full pedicures, maintain your feet with daily moisturizing and weekly nail touch-ups.
Can you do a DIY pedicure if you have diabetes?
People with diabetes can perform a DIY pedicure at home, but they need to take extra precautions due to reduced sensation and slower healing in the feet. Avoid cutting cuticles, use lukewarm water instead of hot, and be gentle with callus removal.
Check your feet daily for any cuts, sores, or signs of infection. If you have any concerns or notice unusual changes, consult your healthcare provider before continuing with DIY foot care.
What’s the difference between a DIY pedicure and a professional one?
A professional pedicure typically includes specialized equipment, stronger treatment products, and techniques that require training to perform safely. Professional pedicurists can address more severe foot issues and often provide services like callus removal with medical-grade tools.
However, a well-executed DIY pedicure at home can achieve very similar cosmetic results and provides the same relaxation benefits while offering more convenience and cost savings.
How long should a DIY pedicure at home take?
A thorough DIY pedicure at home typically takes 60-90 minutes from start to finish, including drying time. This timeframe allows for proper soaking, careful nail work, exfoliation, and polish application. If you’re short on time, you can break the process into segments, doing the prep work one day and polish application the next.
However, for the best relaxation benefits, try to complete the entire process in one session when possible.
What should you do if you get an infection from a DIY pedicure?
If you suspect an infection after your DIY pedicure at home, stop all foot treatments immediately and keep the area clean and dry. Signs of infection include persistent redness, swelling, warmth, pus, or red streaking from the affected area.
Mild infections may respond to antibiotic ointment and proper wound care, but it’s important to see a healthcare provider if symptoms worsen or don’t improve within a few days. Prevention is key – always use clean tools and practice proper hygiene during your DIY pedicure sessions.
Conclusion…
Mastering the art of a DIY pedicure at home opens up a world of self-care possibilities right at your fingertips. The beauty of a DIY pedicure at home lies not just in the money you’ll save or the convenience you’ll enjoy, but in the therapeutic ritual you create for yourself. In our fast-paced world, taking time to slow down and care for yourself becomes an act of self-love and mindfulness.
As you continue your DIY pedicure at home journey, remember to listen to your feet and adjust your routine based on their changing needs. So go ahead, draw that warm foot bath, light those candles, and treat yourself to the luxurious DIY pedicure at home experience you deserve.